Category Archives: Kitchen Tools

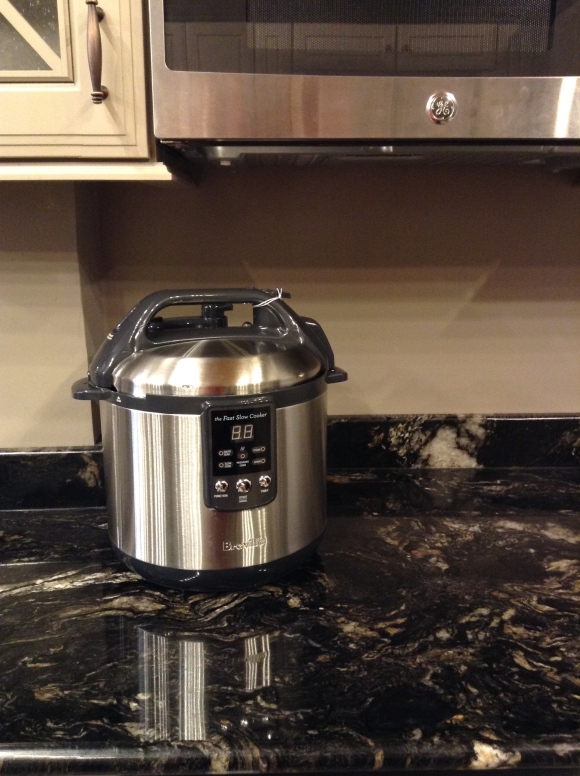
Tool Box Tuesday: Breville Fast Slow Cooker

toolscopy

IMG_0414

By Chrissy Moff, Kitchen Store Specialist

Time is something we all value. Whether you have all the time in the world, or none at all, the Breville Fast Slow Cooker makes the most of what you have available. I personally have purchased this fantastic item, and like all the Breville products, I have yet to be disappointed.

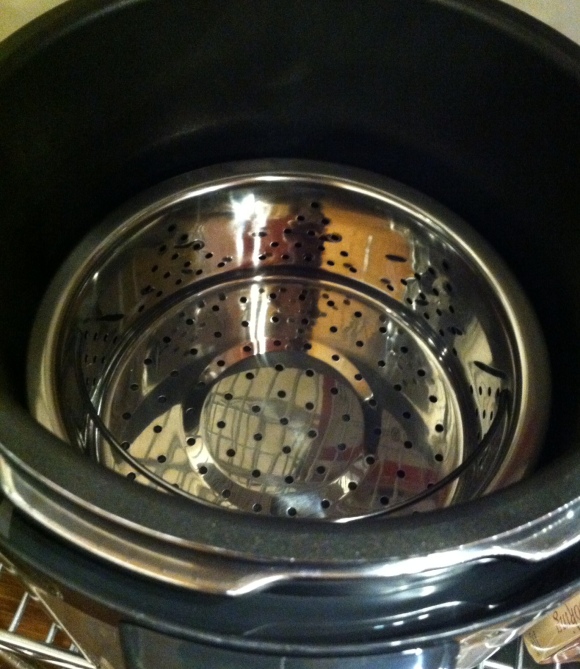
The fast slow cooker has a large capacity of 6 quarts. This is a great feature for large families, dinner parties and even meal prepping. The 6qt cooking bowl is also non-stick and removable! This makes it super easy for serving and clean up. Some other great features are that it has an easy to read LCD display, pressure cook settings Low Medium and High. Breville also includes a couple heat resistant tools along with a steaming basket and trivet. My personal favorite of the cooking settings would have to be Slow Cook (6 or 8hrs) and Pressure Cook (up to 99 minutes). Both of these make putting together dinner an easy task.

photo 2

One of the greatest feelings is coming home and having dinner already done, with the fast slow cooker I’m able to put chicken (or a roast) into the cooking bowl, throw in some hard vegetables, season and then set the Slow Cook setting for 6hrs. After the time is up the automatic “Warm” setting comes on to maintain the heat of the dish without over cooking. If you are using frozen meats I recommend choosing the 8hr setting. The Pressure Cooking feature is amazing for when you’re short on time and need to pull something together in a rush. I put 4 chicken breasts into the cooking bowl, about 1 cup of water, selected 25mins on high pressure and sure enough, after 25 minutes I had perfectly cooked chicken ready, Remove the chicken and toss in some veggies into the steam basket and trivet. Put it on the Pressure Steam setting and in a few minutes they’re ready to accompany the chicken. Both of these settings eliminate the excuses of not having enough time to make a healthy dinner.

Breville Fast Slow Cooker

With features like Saute/Sear, Steam, Slow Cook, Pressure Cook or Keep Warm, plus a timed cook option- the Fast Slow Cooker combine the functions of multiple electrics to cook your meals just the way you want, in the time you have!

Combined with all the other great features, Breville’s Fast Slow Cooker really does it all. I personally have no complaints and totally love mine. 5 out of 5 stars for sure! Definitely an amazing asset to your kitchen.

 

Toolbox Tuesday: Turn up the Heat!

toolscopy

By Tina LeBaron, Kitchen Store Specialist

Playing with your food – it’s something we’re all taught not to do. But when cooking day after day starts feeling like no more than another mundane chore, investing in new kitchen tools can add a whole new level to cooking that makes “playing with your food” a good thing that loved ones will love sampling from!

IMG_4752

So what is one of my all time favorite kitchen tools you ask? The Messermeister Cheflamme Torch of course! I know what you’re thinking; you were also taught that playing with fire is bad. I’m sorry, but bending the rule and throwing a little flame into your kitchen adventures is a great way to keep cooking exciting.

IMG_9286

The first dish that inevitably comes to mind is crème brulee, of which our number one source for recipes comes from a book by Mastrad that unleashes numerous possibilities. Titled Crèmes Brulees: Hot, Cold, Sweet, and Savory, there is something for every palate in the book that will nicely accompany the trusty torch in your future shopping basket.  Candied Orange and Lemon sounds like a tempting flavor combination (my favorite!), and Smoky Bacon Crème Brulee cannot possibly go wrong. But don’t feel limited to only a single use for your fun new toy. Here are some more quick and easy ways to play with fire and food!

IMG_9268

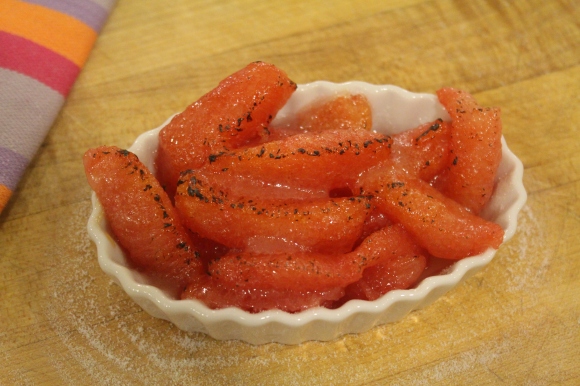
Fresh fruit is wonderful just as it is, but with a quick coating of sugar passed over with your torch, you’ll create a wonderful candied crunch.

IMG_9267

Oranges, grapefruit, and pears were my test subjects. They took a bit more sugar than expected to get the desired caramelized effect. As the sugar heats and liquefies, it can tend to mix with the fruit juices and run right off, which made my pears the easiest to work with.

Chef Lucy suggests kicking them up a notch by poaching them before adding the brulee topping.

IMG_9338

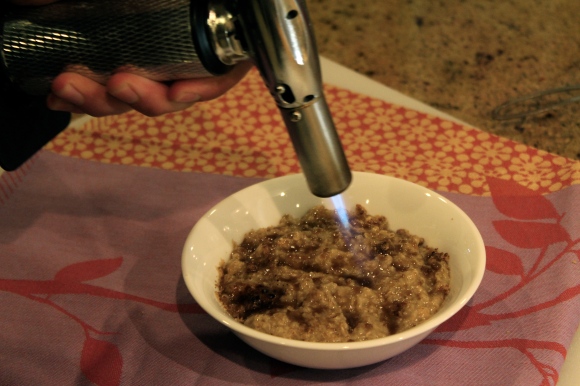
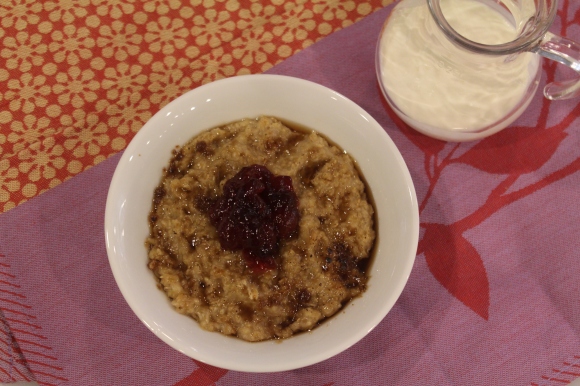
Oatmeal is another fun excuse to bring out the torch. Try topping your next oatmeal breakfast with brown sugar, and melting it with a low flame. Jazz it up even more with your favorite fruits or preserves. Cherry Amaretto from the Petersen Family Pantry is a winner here in the Wasilla store. Next add a bit of milk or cream, and your simple breakfast has – just like that – edged towards gourmet!

IMG_9240

IMG_9253

Next time you’re making cupcakes, try a meringue topping to toast with your torch, or this easy Seven Minute Frosting we put on a batch of Red Velvet Cupcakes, found here: http://www.kingarthurflour.com/recipes/seven-minute-frosting-recipe

IMG_4765

Indoor s’mores in any form imaginable are another obvious must-try when summertime campfires are out of season. My s’more interpretation came in the shape of a marshmallow toasted on a pretzel stick, dipped in some melted Callebeaut chocolate, topped with coconut, and roasted one more time! (Can you tell how much fun I’ve been having with my favorite tool?)

IMG_9372

The torch isn’t just for sweets. It turned out great for roasting provolone cheese over French onion soup and croutons.

IMG_9346

IMG_9357

It’s also great for roasting red bell peppers.

IMG_9280

I used them two different ways. First was for a homemade pizza that had more than one element made with extra love: fresh dough prepared for the crust, a special white wine cream sauce, two proteins, and a jar of artichokes hearts… the red bell pepper needed to shine. We cut it so that it could lay flat, and quickly roasted it with a kitchen torch, adding another elevated layer of flavor to the pizza.

IMG_9288

We cut the top off of another red bell pepper before roasting it and using it as a tasty edible vessel for a quinoa salad.

IMG_9319

IMG_9321

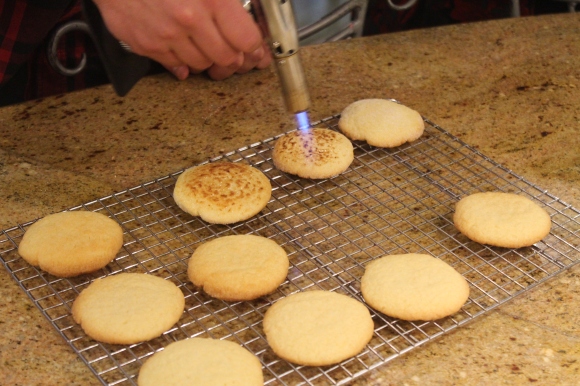
Alas, all roads lead back to… crème brulee? Try skipping the frosting on your next batch of sugar cookies, and go from plain-Jane to a fancy ode to crème brulee. Dip them both before and after baking in a bowl of sugar, then torch the tops just before eating.

IMG_9299

Add a little whipped cream and that cookie just turned into something new and exciting!

IMG_9301

Comment and share photos of your favorite uses for the torch, or another cooking gadget that keeps you having fun in your kitchen!

Tagged

On (selecting) the (perfect) Chopping Block (for your kitchen).

by Tina LeBaron, Kitchen Store Specialist

IMG_8873

So, you’re shopping for cutting boards…..

Before you feel like you have to narrow it down to just one, keep in mind that it’s a great habit to have a couple different boards for different foods, especially to ensure no cross contamination from raw meats in your cooking. Here’s the lowdown on our favorites.

IMG_8884

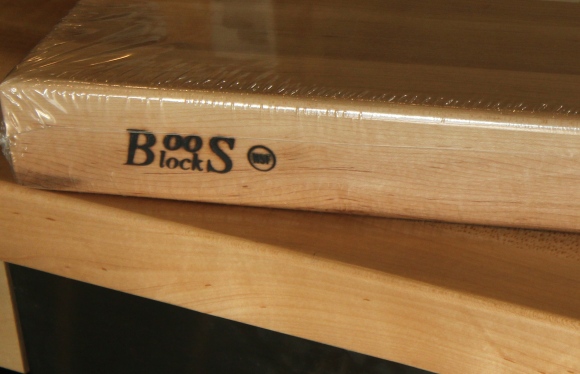
John Boos

Let’s start with the perfect surface for prepping meat. A John Boos block is the heavy-duty professional grade option in cutting boards – the leading manufacturer of wooden butcher blocks, in fact. Made in Illinois since 1887 these sturdy blocks are available in maple, cherry, and walnut. A Boo’s block is great because they are weighted and won’t slide around during serious meat butchering jobs, and will withstand cracking from heavy knife use. Your knives will hold they’re edge longer on the soft wood surface compared to using something harder. They take just a bit of loving care to prolong their life in your kitchen. Just wash with warm soapy water and dry completely. The wood is preserved by applying John Boos mystery oil or cream periodically, and can be given a like-new surface with a light sanding if needed. Fight any odors and stains using salt and lemon or lime juice as a scrubbing agent, or a quick soak in a vinegar solution for extra disinfecting. Despite the belief that wood harbors pesky and potentially dangerous bacteria, these boards are National Sanitation Foundation (NSF) approved, and the notion has been scientifically disproven. Read more about the details of the study here: http://www.johnboos.com/uploads/files/PDF/wood-vs-plastic-cutting-boards.pdf.

IMG_8897

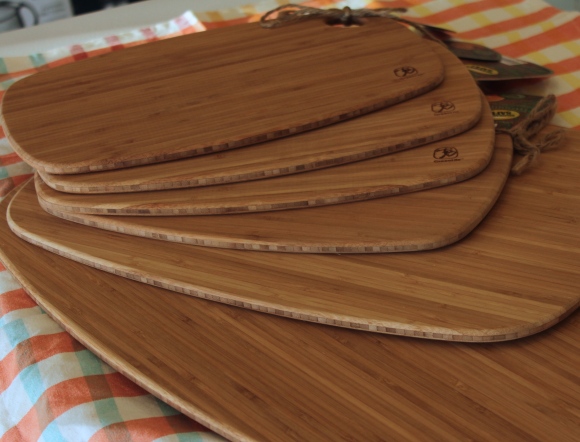
Totally Bamboo

Bamboo boards are perfect for those who are eco-conscious by nature, and as of yet, these have been the most popular choice in cutting boards. Bamboo comes in ranking 16 percent harder than maple, a third lighter than oak, yet incredibly tough. The bamboo plant is exceptionally sustainable – after harvest it grows back in only four and a half years compared to the 30-60 year growth cycle of most other wood options. Being that bamboo absorbs very little moisture, shrinking and swelling that can crack a cutting board is reduced, but it does still require periodic oiling or else cracking will be an issue, particularly in our Alaskan climate.

IMG_8892

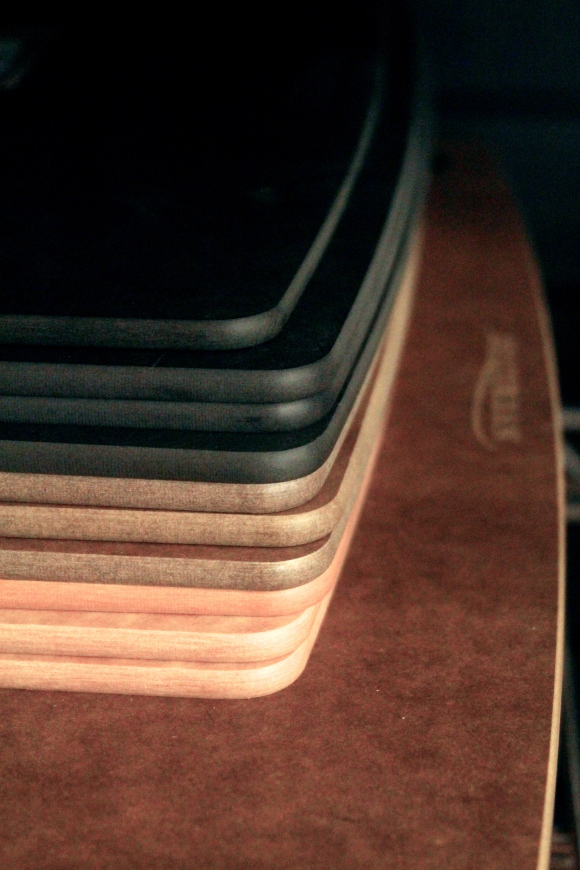
Epicurean

Made in Duluth, MN, these handy boards are easy to maintain, dishwasher safe (score!), and do not harbor any bacteria whatsoever. Made of multiple layers of Forest Stewardship Council (FSC) certified organic wood fibers pressed with a food-safe resin, Epicurean boards are lightweight for mobility and easy storage, can withstand temps up to 350 degrees, and there’s no need to keep them pampered and oiled and they are tough as can be. The proof is in the pudding… Epicurean’s material was originally made for skate park surfaces! The pressed wood compound stands strong against abuse from weather and skaters, making their kitchen tasks a piece of cake in comparison.

IMG_8875

IMG_8877

They come in a variety of shapes and sizes – like our favorites, the mustache or salmon, an iPad holding board, some with nifty rubber feet to hold it in place and others with grooved borders and textured surfaces to reduce sliding for heavy duty carving. And, it’s always nice to hear that the company has earned multiple awards for ethical business practices while each year employees participate in a tree-planting day to offset the manufacturing process.

IMG_8870

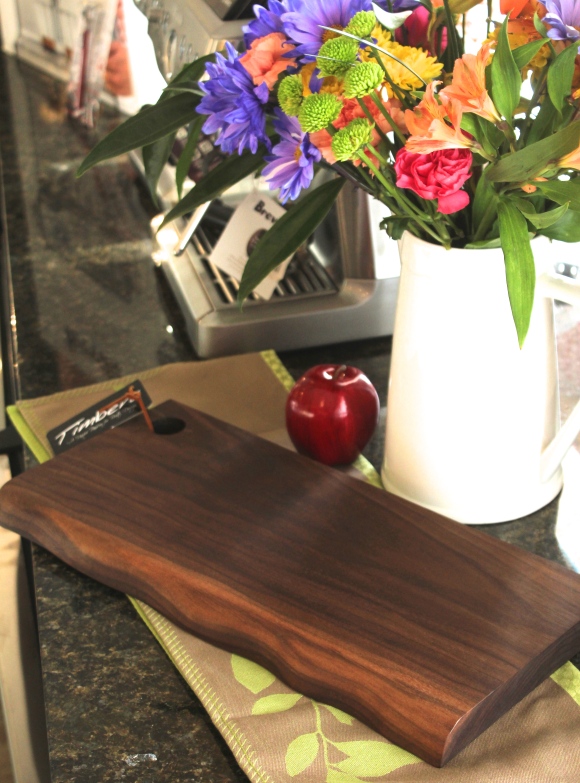
Timber Live Edge Walnut

Here we have a board of stunning rustic beauty, perfect for serving. Made in Ontario, Canada, the “live edge” is true to the shape of the tree it was harvested from. Even though these handsome walnut boards can be used for cutting and not just serving, the silky smooth finish makes for a functional display item, not unlike a piece of furniture. Each item sold by Timbers is hand carved with superb craftsmanship and the perfect gift for the gourmet “foodie” in your life. Again, with a wood so fine, avoid the dishwasher and don’t forget to give it an occasional oiling.

For those seeking to hone their knife skills, there’s even a cutting board from Fred marked with the dimensions of popular knife cuts from ‘cubed’ to ‘diced’ to ‘julienned’!

IMG_8898

Now C-HOP to it!


Tagged

S’Mores you’ll need more of…

By Ashley Adams, Kitchen Store Specialist

One culinary delight that goes hand in hand with summer is the s’more. There isn’t much better than the combination of crisp graham cracker, rich chocolate, and squishy sweet marshmallow all sandwiched together in delicious gooey chocolate mess!

We’ve all grown up making and eating them, and the recipe is pretty standard, so how can you improve this classic campfire favorite? Make it from scratch! As with most things, homemade is better, and s’mores are no exception. We started by making homemade graham crackers. Graham flour gives these crackers their distinct taste- it is stone rolled and has a coarser texture and almost nutty flavor. Sweetened with honey and rolled thin to give them crunch, these graham crackers made the perfect base for our s’mores.

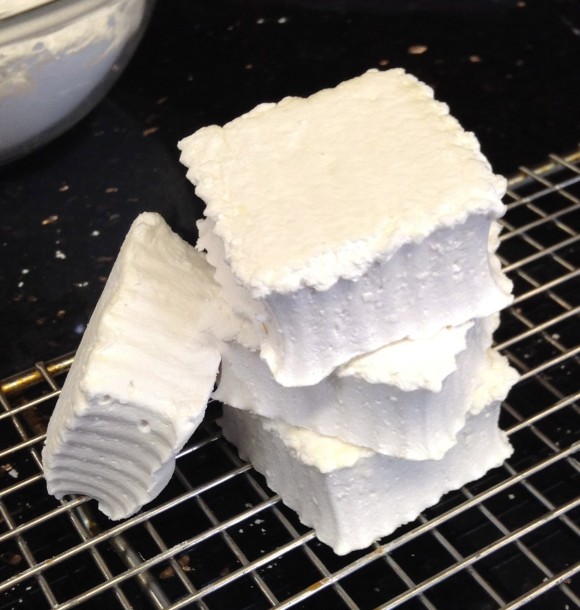
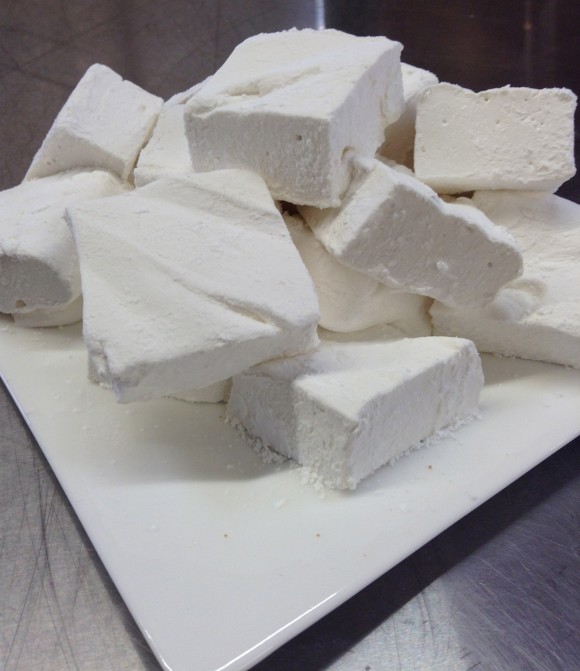
Next we topped them with oversized marshmallows made from scratch. Once you make homemade marshmallow you will never want to settle for the dry, flavorless ones out of a bag. Homemade marshmallows are smooth, creamy, melt-in-your-mouth squares of billowy goodness.

IMG_0060

[GRAHAM CRACKER INSTRUCTIONS]

Ingredients:

2 cups graham flour

1 cup all-purpose flour

1 teaspoon baking powder

1⁄2 teaspoon baking soda

1⁄2 cup margarine, softened

1⁄2 cup packed brown sugar

1/3 cup honey

1⁄2 cup milk

Cinnamon & Sugar (optional)

Directions:

  1. Sift together the whole-wheat flour, all-purpose flour, baking powder and baking soda; set aside.
  1. In a medium bowl, cream together the margarine, brown sugar and honey until light and fluffy. Stir in the sifted ingredients alternating with the milk and

vanilla. Cover dough and refrigerate overnight.

  1. Preheat the oven to 350 degrees F (175 degrees C). Divide the chilled dough into quarters. On a well

floured surface, roll the dough out one quarter at a time into a 5×15 inch rectangle. Divide into rectangles

using a knife. Place rectangles onto ungreased cookie sheets. Mark a line down the center of each one, and prick with a fork. For a cinnamon flavored cracker,

sprinkle with a cinnamon sugar mixture before

baking.

  1. Bake for 13 to 15 minutes in the preheated oven. Remove from baking sheets to cool on wire racks.

IMG_0050IMG_0053

Spread with peanut butter, Nutella or marshmallow cream or simply enjoyed with a tall glass of milk, these crackers are a perfect snack. And they make the perfect base for a decadent s’more.

Because marshmallows are essentially whipped sugar, gelatin, and flavoring it is important to use a high quality vanilla.

With ample high-quality Mexican vanilla these ‘mallows had a pronounced vanilla flavor that couldn’t be rivaled by any store-bought marshmallow.

They are incredibly easy to make, especially with the help of our Kitchenaid mixer, which does the majority of the work.

IMG_0076

[MARSHMALLOW INSTRUCTIONS]

IMG_0003

Start by reconstituting the unflavored gelatin with ½ cup of cold water in the bowl of the stand mixer. Let it sit while you mix the remaining ½ cup water, sugar, corn syrup and salt in a medium saucepan over medium high heat. Using a candy thermometer cook until the mixture reaches 240 degrees. Immediately remove from the heat.IMG_0011

Using a whisk attachment, turn the mixer on low speed and slowly add the sugar mixture down the side of the bowl into the gelatin mixture. Once it is all incorporated increase the mixer speed to high. Whip on high until the mixture becomes thick and the bowl is lukewarm, approximately 15 minutes. Add the vanilla and whip for another minute.

IMG_0014

IMG_0025

While the marshmallows are whipping, mix the corn starch and powdered sugar. Spray a 9x13inch pan with cooking spray and add the powdered sugar into the pan, making sure to cover up the sides as well. Shake the pan around to evenly distribute the cornstarch mixture and dump the remaining back into the bowl.

IMG_0024

IMG_0027

IMG_0028

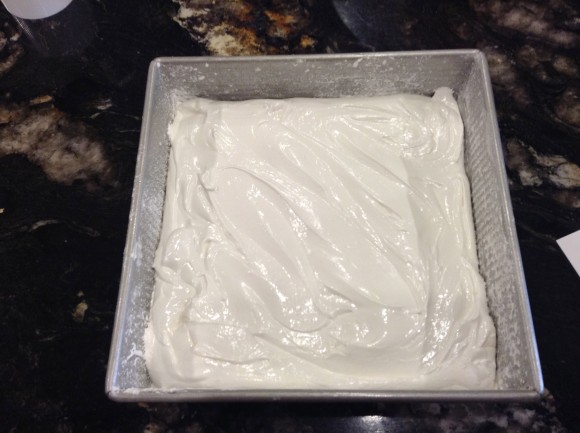
Spread the marshmallow mixture into the prepared pan and spread using a spatula sprayed with cooking spray. Dust with enough cornstarch mixture to cover.

Let the marshmallow sit for at least 4 hours, or overnight to set up. (If you are like us and you cannot wait- the marshmallows are super delicious, but it will be very, very messy!)

b&W

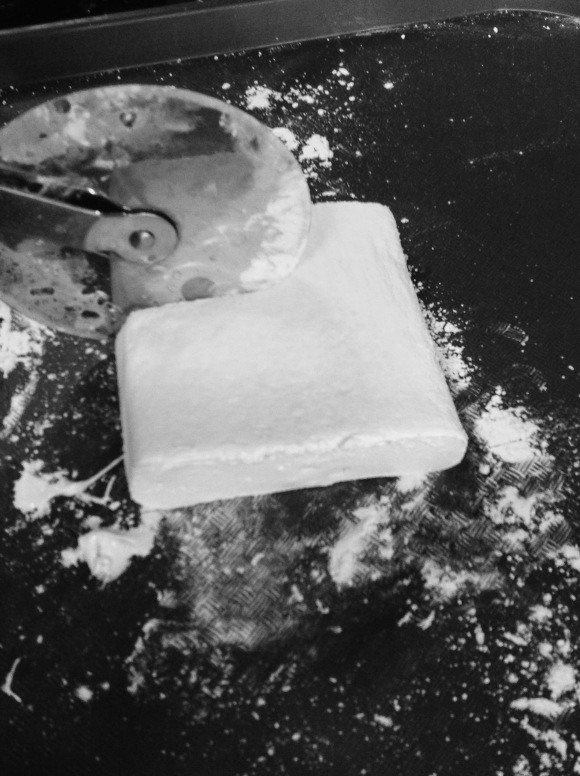
Turn the marshmallows out onto a cutting board and cut into squares using a pizza wheel dusted with the cornstarch mixture or sprayed with cooking spray. Lightly dust all sides with the cornstarch mixture. These marshmallows can be stored in an airtight container for 3 weeks. If they last that long!

b&w2

We can’t wait to make some more marshmallows using cute cookie cutters and various flavors and toppings. How cute would they be on top of a cup of hot cocoa with peppermint flavoring. Or maybe dyed pink and cut into heart shapes, with the edges rolled in pink sanding sugar for Valentine ’s Day.  The possibilities are endless!


Tagged ,

Canning & Rhubarb 101

by Tina LeBaron, Kitchen Store Specialist

jars

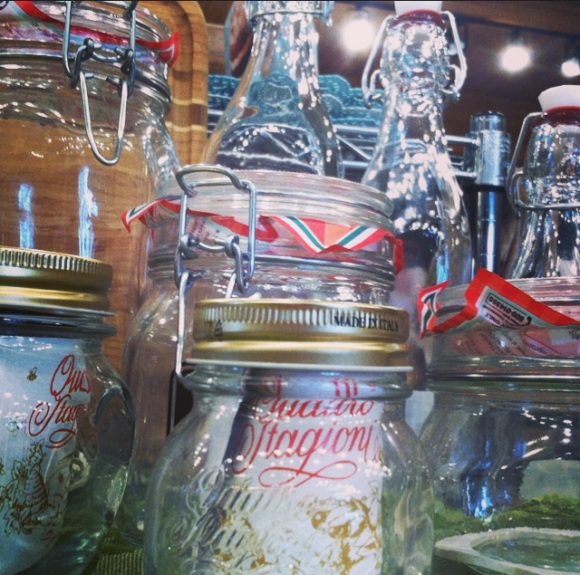
‘Tis the season of ripening gardens! Be sure not to let any of the earth’s fresh goodness and your summer laboring go to waste! I’m calling out to the amateur gardeners and the first time canners. The task of supplementing your winter pantry is not as hard as you may first think. So here I’m passing along to you the basics of canning – courtesy of Wasilla’s Chef Lucy – with Alaska’s most abundant crop – rhubarb.

Rhubarb

What you’ll need: a water bath canning pot, a jar rack or basket, a case of jars, some low sugar pectin from the grocery store, and your garden’s rhubarb.

Canning Supplies

Begin by filling your water bath about half way full and turn up the heat to bring water to a boil. Wash and chop the rhubarb into pieces – about an inch long. Drop them into a stockpot with a fourth or so cup of water, regardless of the amount of rhubarb since it will cook down and seep out into a juicy substance.

Rhubarb Jam

Also add in sugar to taste, or as according to the pectin’s directions. For a flavor twist, throw in fresh or frozen fruit, like strawberries or blueberries.

Jam 2

Once the fruit is as broken down as desired and boiling, add your pectin to act as a thickener. Stir to incorporate and dissolve, then bring back to a boil. Allow the fruit to simmer for about five minutes. And just like that, you are ready to can!

Canning

You can warm your clean jars first, in your water bath, but Chef Lucy recommends placing the jars on a cookie sheet and warming them in a 200-degree oven for about ten minutes. Next, use a large funnel if you have one, or just ladle the fruit into your jars.

Canning 2

After checking that the lids are clean and dry, twist the jar lids on and you’re ready to lower them with the canning rack down into the hot water. Let them be in the covered water bath for 25 minutes. Lastly, remove the jars carefully from the pot, we suggest using a jar lifter as the lids and glass will be HOT!, and set them aside until cool. Now you’ll hear the popping of the lids and know the job is done.

Jars in bath

Viola! You now have accomplished the basics of canning. For more, check out the Wasilla Cooking School’s schedule for Lucy’s Hot Water Canning class!       jams

You can also explore other exciting flavor combos and current tips for preserving in one of our favorite cookbooks, Canning for a New Generation.


Tagged

“Think Outside the Box”…

By Christina Moff, Kitchen Store Specialist

Popcorn Cubes

We’ve all heard this phrase about ten thousand times. But why think outside the box when you can think about what to put inside of it? A big trend over this last year has been making foods more interesting and changing sizes and shapes seems to be the most popular.

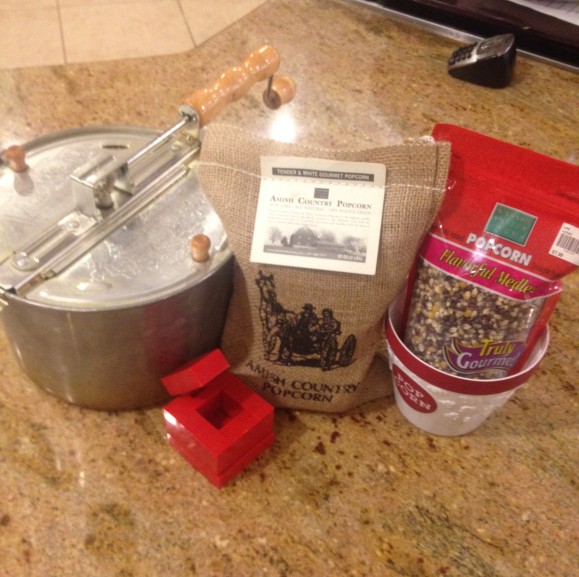
The Rice Cube is one of the best gadgets you could buy to make fun, inventive appetizers and even add-ins for main dishes. For example, one fun new thing I discovered was a popcorn cube.

rice cube

I used the sweet popcorn glaze recipe from jensfavoritecookies.com as the binding agent and it also gave the popcorn that nice carnival flair. It was probably the easiest snack I’ve made, plus it was fun!

You can take just about any pliable food, (cookie, brownie, fudge, hamburger, or sausage) follow the simple Rice Cube process and create something that will wow your guests but also allow them to have a great time making it themselves.

In the culinary world, presentation and appearance is often valued just as highly as taste and texture.  Sushi is becoming one of those foods that everyone wants to make. It’s beautiful, tasty, cultural and always a crowd pleaser. It can, however, be tricky to make: there are mats, paddles, and specific rice to use. Most times the whole process kind of throws people off, for some it takes too long or they just cant get the hang of it.

The Rice Cube is specifically geared toward making sushi. Not only is it simple enough to do that 3 year olds are making their own sushi, but its fantastic for those picky eaters who want to know exactly what goes into their food. With the rice cube you could have a DIY (also a big fad) dinner party, and everyone would be satisfied. And not to mention all the compliments for being the most creative host/hostess out there.

Popcorn Cube2

If you’re creative, or just looking for a fun way to make little snacks and things, then the Rice Cube is for you! Check out their website for videos and yummy fun recipes you can make with you own Rice Cube. Stop in at the Wasilla store for a demonstration and purchase.


Tagged ,

Here we go a Waffling…

By Christina Moff, Kitchen Store Specialist

As we find ourselves in the kitchen, whether it be as schooled professionals or the self proclaimed top chef, there are certain products we each become attached to. For me, it’s Kitchen Aid mixers over the Bosch, or metal measuring cups instead of plastic sets.

-1

While there are a great many tools, products, and brands that I am partial too, there is only one tool that I am irrevocably in love with right now: the Chef’s Choice round waffle iron. I can’t even put into words how awesome it is. I know you’re thinking, “its just a waffle iron, there’s not much exciting about that” but you would be oh so wrong.

IMG_2835

The options are amazing, and endless. You can do a full breakfast with hash browns, French toast, fried eggs, or omelets, bacon (perfection in itself) and of course the many types of waffles.

IMG_2833

Then there are the mouth-watering lunch or dinner dishes; pizza, calzones, grilled cheese, homemade tortillas and of course the fajita fillings. All of this, with just one waffle iron.

-5

Now if that hasn’t convinced you to run to our store and buy every kind of waffle iron available then how about this: every classic comforting dessert can be done in the Chefs Choice iron.

-4

I loved the way my cinnamon rolls turned out, perfectly soft, and rather than icing running everywhere it stayed in all the squares, making each bite its own level of perfection. So much less mess and more convenient to grab-n-go on your way out the door. Cookies, brownies and even cake mixes can all be used as well.

-3

The waffle iron is the perfect size and it is nonstick, so you just wipe it out with a paper towel when you’re finished.  Trust me on this, I’ve been on a waffle iron kick this past month and I have yet to be disappointed with the Chefs Choice round Belgian Waffle Maker. Stop by the Wasilla location for demos and purchase!

IMG_2829

Tagged

Choosing your Cutlery: Part One

DSC_0554

Shopping for a knife is not only an investment, it can also be a bit intimidating. Jumping into a huge purchase, like a large knife set, can be daunting when you don’t know whether you’ll even like the knife line. Whether you are selecting your first cutlery, upgrading, gifting or just adding to your own set, here are some tips from our Cooking School Coordinator, Chef Lisa Chang on making this serious selection.

b8578524a0a3d93738f7e6170f71b191

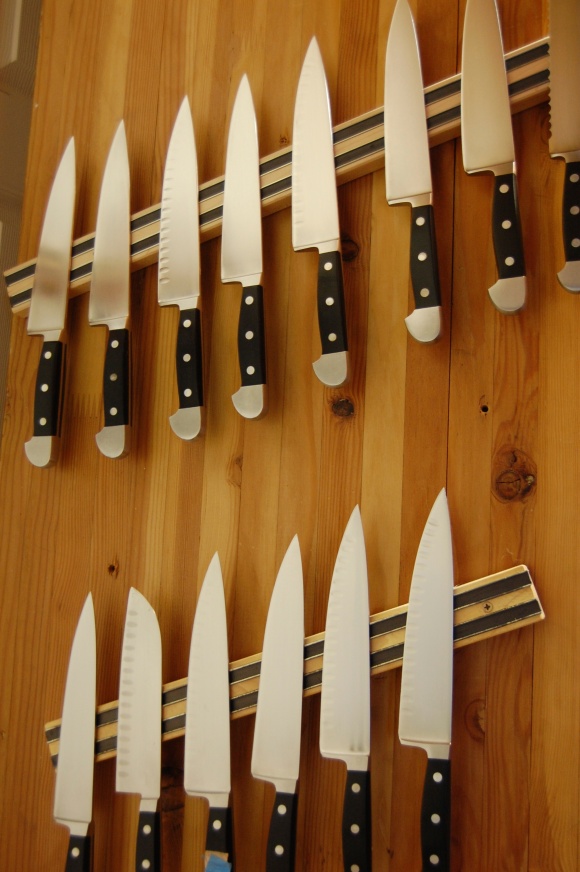
For starters, Chef Lisa suggests that the two basic ‘must-have’ knives for any kitchen are a 6-9 inch chef knife and a 3-4 inch pairing knife. The average home chef can make just about every cut necessary with one or the other, so begin here and find out what works for you, your style of cooking and your expectations for a quality kitchen knife. As you discover your preferences, you can add pieces to your set and build your collection from various lines, styles and materials.

Where to start when choosing a knife:

41ecc24168ec120bbad245d9f6f629c9

Chef Lisa suggests, “There are several important elements to choosing a knife. When it comes to the handle style, make sure the form of the handle fits comfortably in your hand. Grip the handle in your hand and mimic a chopping motion. If you find that your hand doesn’t have to adjust too much to grip the handle properly.”  This will indicate a comfortable handle once the work gets started.

DSC_0560

“Also,” she notes, “make sure that you can see the steel material of the knife coming through the handle to the back and look to see that there are three bolsters through the actual handle.”

This not only acts to secure the blade, “it is important for the balance of the knife. You should be able to hold the knife flat with one to two fingers at the neck of the knife without it tendering.”

P1020630

“Now that you’ve got the handle style picked out, think about how much you use your knives. The most important part of caring for your knives is keeping them sharp. A sharp knife is a safe knife. So now when choosing the material for your knife, you have to ask yourself how much time you are willing to give to maintaining your knives.”

DSC_0464

“There are several different combinations of materials used in the blades of knives. The harder German steel knives take a lot more time to sharpen then a softer Japanese steel knife. With a harder steel knife, once sharpened the sharp edge will last a lot more cuts.”

DSC_0460

“With a softer steel knife though it is easier to sharpen you will have to sharpen them more often.”

DSC_0570

“Most of the big brand name knives come with instructions on how to properly sharpen the knives (including the angle), and it is important that you have the proper sharpening tools to sharpen the specific steel your knives are made from.”

A ceramic blade is also a consideration in knife material, and while it keeps an edge longer than a metal knife, it is sharpened differently than a steel blade would be. Kyocera, for example, suggests you send your knives back to the manufacturer for sharpening, so while the process takes place less frequently, it is important to plan the time needed for sharpenings.

P1020589

Once you’ve selected your knife, it is important to keep it in good working condition.

“It is up to you as to how much time you have to care for your knives. If you don’t really have the time and skill to sharpen your own knives you can always take them to a knife sharpener. ”

Again, this is an investment and proper care will not only make sure your knives perform properly, it also means safety and satisfaction for the user.

Chef Lisa reiterates, “I want to emphasize that any knife can be the best knife ever so as long as you keep them sharp.”

DSC_0565

USA Made Kitchen Tools

By Beth Brown, Kitchen Store Specialist

IMG_3878

It is increasingly difficult to find kitchen products that are made in the USA, so we want to give a shout out to some of our favorite products from companies who are committed to quality, American manufacturing.

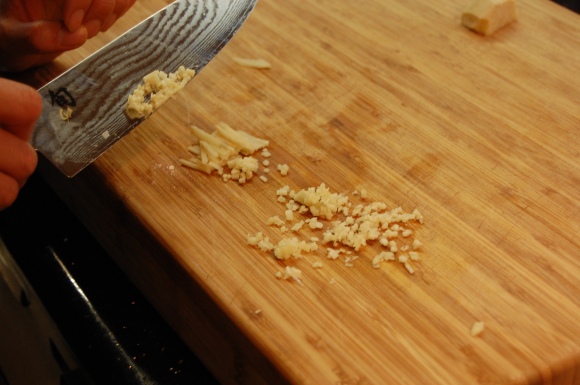
One of our favorite kitchen gadgets is the Garlic Twist, from NextTrend Products. By now you’ve probably heard about this tool, used it in a cooking class, or maybe you’ve seen it sitting on our checkout counter in the kitchen store. We like to keep it there so we can show everyone who hasn’t heard about how great this tool is! Unlike the traditional, difficult to clean and somewhat unwieldy garlic press, the Garlic Twist is easy to use, and dishwasher safe. You use the base of the Twist to whack the garlic clove, making it easy to peel, and then stick your clove inside and simply twist to mince your garlic. This is fun for kids to use, too, when they want to help out in the kitchen.

IMG_3406

Another of our favorite USA made tools is the Microplane grater. These graters come in all different sizes and styles for whatever you are grating, from cheese to chocolate to veggies or nutmeg. They are razor sharp, and solidly constructed, which means they help you get the job done quicker and easier. Microplane graters came about from a housewife who borrowed her husband’s Microplane woodworking rasp to zest her oranges. From there, Microplane expanded to include kitchen tools and has never looked back. If you haven’t tried these graters yet, you need to!

IMG_3407

The last featured USA product is the Epicurean cutting board. These are our go-to boards because they are made out of compressed wood fiber. Not only does this make them more sanitary, it makes them easy to clean—can you say “dishwasher safe?” They are a hard surface, but not too hard for your knives. Unlike other wood cutting boards, you don’t have to worry about oiling, warping, or splitting. They come in all different sizes (and shapes) and look beautiful in your kitchen, as well as being functional. Come check out the pizza peels or mustache-shaped cutting board for Father’s Day gift ideas!

IMG_2855

These awesome kitchen gadgets are superior quality—and you can feel great, like we do, about supporting companies that are proud to be manufactured in the USA.

Tagged ,

“Please pass the Ketchup Salt.”

By Beth Brown, Kitchen Store Specialist

tommies

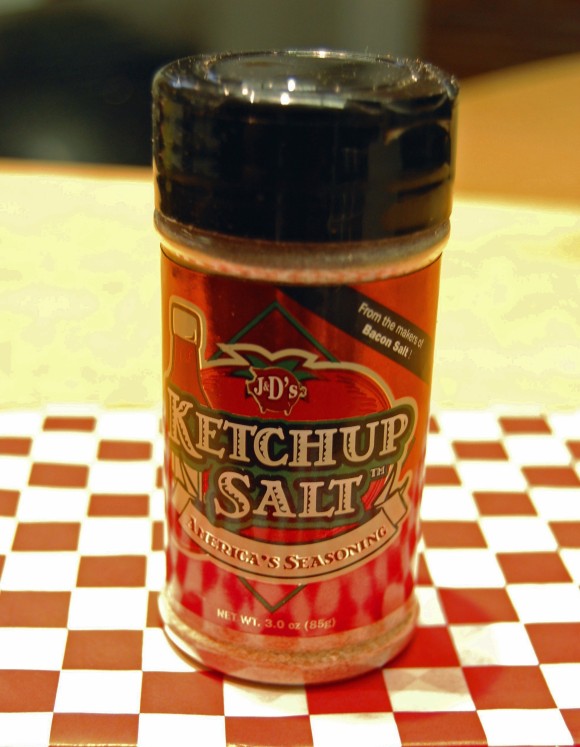
Not long ago, this request would have resulted in a two-handed pass of both the ketchup bottle, and the salt shaker – but no more! From the clever minds at J&D’s Bacon Salt comes a new mover and shaker – the ingenious Ketchup Salt.

salt

When we got our first box of the stuff, we instantly started brainstorming what to use it on. Fries seemed to obvious, chips too simple and so we dreamed up the ‘Hip to be [Hamburger] Square’ Appetizer!

bite

These mini burger cubes are a fun, cute, and delicious summer appetizer! That’s right: we said “burger cubes.” With the help of our Rice Cube, we thought outside the box (er . . . cube) to come up with this fun appetizer idea. Here’s how we made these bites of cuteness.
sprinks2

First, finely chop a white or yellow onion. You can use a knife, like I did (check out that beautiful Henkel knife!), or you can give it a quick spin in your food processor.

knife

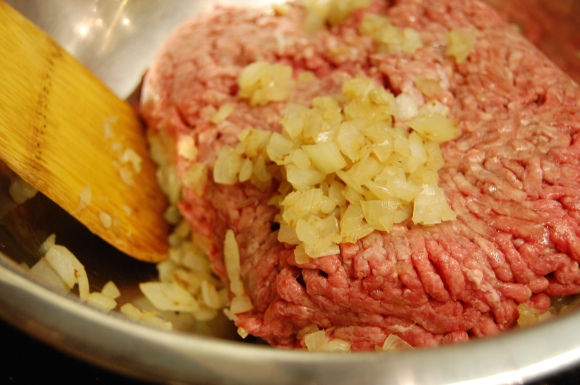
Cook the onions on medium heat just until clear.

onion

In a medium bowl, stir the onion with a pound of ground hamburger until uniformly combined.

mixin

mixin2

pan

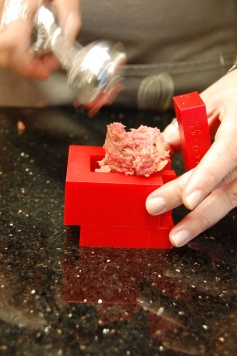
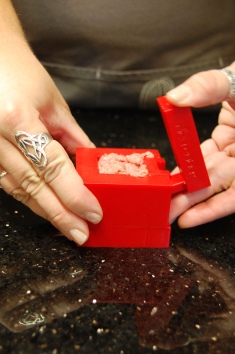
Use a portion scoop to fill the hole of the Rice Cube, and then squish it together, as pictured.

rice cube1ricecube3

If you are planning to ‘stuff’ the bite, this is the point at which you could nestle your filling into the burger before pressing it into a cube.

ricecube4rice cube5

Carefully slide out the insert of the rice cube to remove the hamburger cube, and place on parchment paper.

cubes2

After you finish forming your cubes, it’s time to cook them up!

hotpan

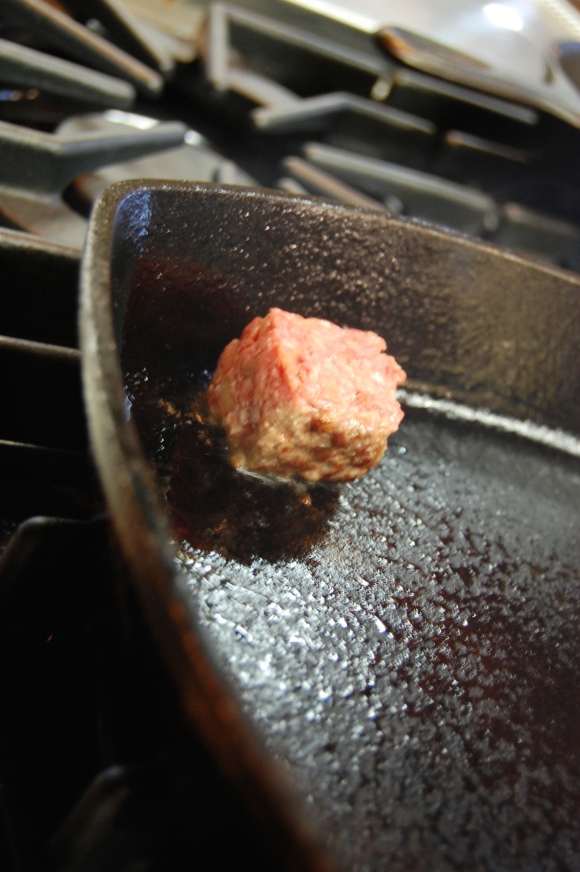
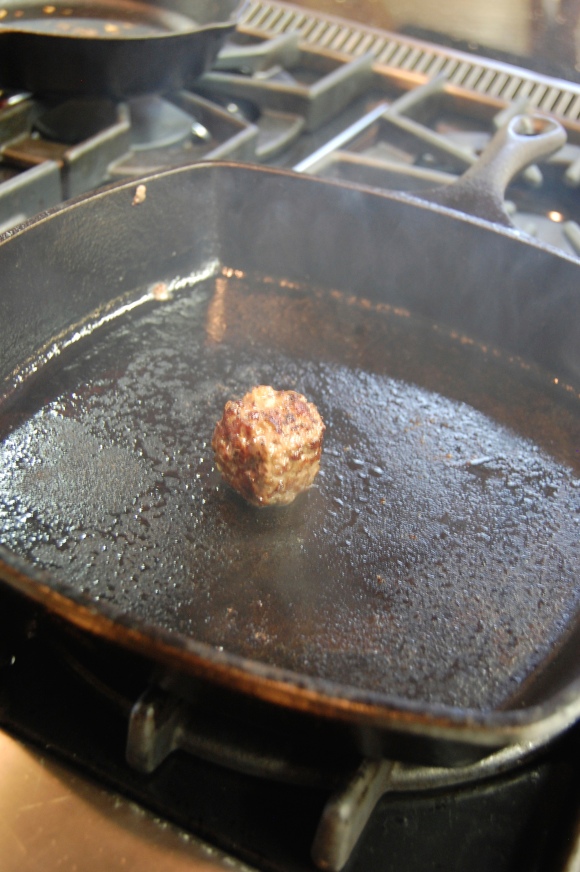
We used our lodge cast iron pan to get a great sear, and replicate the taste of grilled hamburgers.

cooking1

cooking

cooking2

Carefully cook the cube on every side, allowing time to brown, and in between turning, place a lid or cookie sheet over the top to help the burger cubes cook on the inside.

When cooking the last side, place a small square of cheese on top (if you want cheeseburger bites!).

tray2

leaning

The assembly of these guys is where you can get creative.

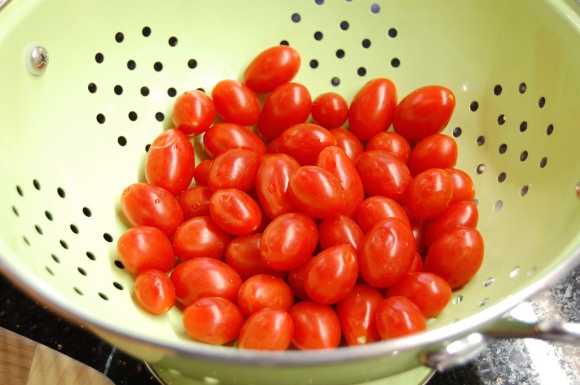
We kept ours simple to highlight the flavor of the ketchup salt (a fun seasoning that gives ketchup flavor to anything!), with just a tiny square of cheese and a single grape tomato, but you could use avocado, mustard, a bit-o-bacon – perhaps stuffed with blue cheese or jalapeno jack . . . the possibilities are endless!

washed

You could even have a mini burger bite bar, and let your guests assemble their own.

tray

These little burger cubes are sure to impress your guests, and are a tasty bite size summertime hors d’oeuvres!

saltdip

Tagged ,